How to Easily Cast Oculus Quest 2 to Your TV: Step-by-Step Guide for 2025
Are you wondering how to cast your Oculus Quest 2 to TV? With the rise in immersive experiences brought by virtual reality (VR) gaming, sharing these experiences on a larger screen has become increasingly popular. In this guide, you’ll learn how to effortlessly connect your Oculus Quest 2 to your TV, whether you’re using Chromecast, HDMI, or the Oculus app. Let’s dive into the details of Oculus Quest 2 casting!
Getting Started with Oculus Quest 2 Casting
Before you can cast your Oculus Quest 2 to a TV, it’s important to understand how the casting process works. Primarily, you can utilize wireless casting via Google Chromecast or simply connect with an HDMI cable. Your choice will depend on your specific setup and preferences. This section will clarify the differences between these methods and the basic requirements you’ll need for a seamless Oculus Quest 2 setup for TV.
Wireless Casting with Chromecast
If you prefer the convenience of wireless casting, using a Google Chromecast with your Oculus Quest 2 makes the process straightforward. Ensure you have the latest version of the Oculus app installed on your smartphone, as it is the best way to initiate the casting process. First, connect the Chromecast to your TV and make sure both your Oculus Quest 2 and the Chromecast are on the same Wi-Fi network.
To begin viewing Oculus Quest 2 on TV:
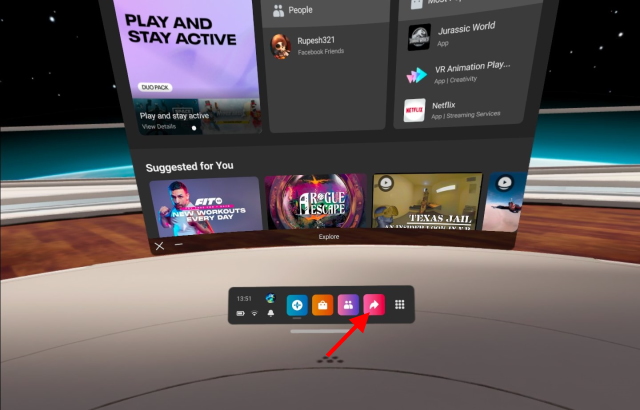
- Put on your Oculus Quest 2 headset and navigate to the Share menu.
- Select the Cast option and choose your Chromecast device from the list.
- Confirm the casting request on your TV.
Once completed, you can now enjoy your gameplay on the larger screen. This method not only enhances the VR experience for players but also allows viewers to engage with the action.
Connecting Oculus Quest 2 via HDMI
If wireless casting isn’t ideal for you, connecting your Oculus Quest 2 using an HDMI cable is a reliable alternative. This method is great for minimizing latency and offers consistent video quality. Start by finding a compatible HDMI adapter or using an existing one. Most HDMI cables work with devices that support video input.
Follow these simple steps to set up HDMI casting:
- Attach the HDMI adapter to your Oculus Quest 2 headset.
- Connect the HDMI cable from the adapter to your TV.
- Switch your TV input to the corresponding HDMI port.
After confirming the connection, you should see your Oculus interface mirrored directly on the TV. This is an excellent way to showcase your skills while playing games or demonstrating VR experiences to friends and family.
Configuring Oculus Quest 2 Settings for Optimal Casting
Setting up your Oculus Quest 2 for casting entails more than just connecting to your TV. By adjusting various settings in the Oculus interface, you can optimize the casting quality and ensure a smoother performance. Let’s explore how to set up everything correctly for an enhanced viewing experience.
Oculus Settings for Casting
Before attempting to cast, it’s essential to dive into the Oculus settings for casting. Navigate to the Settings menu within your Oculus Quest 2: Go to “Settings” > “Device” > “Casting.” Here, ensure that casting permissions are enabled and that your Oculus pairing with other devices is active.
Additionally, consider adjusting graphic settings based on your TV model and capabilities. This can impact resolution and performance during gameplay. Major tweaks can significantly improve your overall experience while playing Oculus Quest 2 on TV.
Troubleshooting Common Casting Issues
Despite best efforts, issues may arise during the casting process. Effective troubleshooting can save you time and frustration. For instance, ensure that your Wi-Fi network is stable, and avoid using multiple devices connected to the same bandwidth, as both can lead to lag. Also, accounting for Oculus Quest 2 troubleshooting guidelines can help in case something goes wrong.
If you encounter disconnection issues, try restarting both your headset and the Chromecast (if being used). Certain interfering apps in the background could also impact the performance of your casting. Taking the time to ensure a smooth experience will allow you to focus on enjoying your VR gameplay.
Tips for Enhancing Your Oculus Quest 2 Casting Experience
Once you have your Oculus Quest 2 set up for casting, consider the following tips to enhance your VR experience on the larger screen. These can help you create a more immersive atmosphere and overcome any common barriers related to casting VR to television.
Utilizing High Quality HDMI Devices
If you’re opting for HDMI connectivity, it’s advisable to use high-quality cables that ensure minimal latency and strong signal transmission. Look for HDMI cables that are specifically designed for gaming and have a solid reputation among users. Most HDMI cables work, but going for the best option can significantly impact your gaming experiences.
Maintaining Strong Wi-Fi Connections
For wireless casting, having a reliable internet connection is paramount. Poor connection strength can lead to disruption in casting, causing gameplay to lag or stutter. If problems persist, consider moving your router closer to the Oculus Quest 2, or you might invest in a Wi-Fi extender to improve coverage, especially when multiple users are connected. A good understanding of Wi-Fi network requirements for VR casting is essential for ensuring an enjoyable experience.
Conclusion
In summary, knowing how to cast your Oculus Quest 2 to a TV opens the door to a shared VR experience that enhances gaming fun for everyone. Whether using a wireless connection with Chromecast or a straightforward HDMI setup, achieving successful casting relies on a solid understanding of both hardware and software settings. Implementing the suggested tips can lead to enjoyable immersive gaming experiences for you and your guests for years to come.
FAQ
1. Can I use my smartphone to cast Oculus Quest 2 to TV?
Yes, you can use your smartphone to initiate casting to your TV using theThe Oculus app available on iOS and Android. Ensure both devices are connected to the same Wi-Fi network before starting.
2. Are there any casting restrictions for Oculus Quest 2?
Yes, certain apps may have restrictions on casting due to privacy concerns or licensing rights. Always verify the particular app’s casting policies before attempting to share your screen.
3. How do I fix a lagging display when casting Oculus Quest 2?
To minimize lag, ensure your Wi-Fi connection is strong and reliable. Additionally, make sure that no other devices consume your bandwidth during casting sessions. Adjusting graphic settings in the Oculus interface can also help reduce lag.
4. Can I engage in multiplayer gaming with casted Oculus Quest 2?
Yes! Multiplayer gaming can add an interactive element while sharing your gameplay, enhancing the experience for everyone watching. Ensure all players are connected well to avoid performance issues.
5. What are the benefits of casting Oculus Quest 2 to a larger screen?
Casting to a larger screen provides a more immersive experience and allows friends and family to participate in your VR activities. It also encourages social interaction and feedback during gameplay.
Using these simple steps and guidelines, you can enjoy the thrilling world of VR with your available setup, making every gaming session rewarding and entertaining. Don’t hesitate—a new virtual adventure awaits!