“`html
Effective Ways to Get a Splinter Out: Heal Fast and Stay Safe in 2025
Getting a splinter is a common occurrence that can cause pain and discomfort. Understanding how to remove splinter effectively is crucial for both quick relief and prevention of complications. In this guide, we will cover a range of topics from effective splinter removal techniques to aftercare tips, ensuring you know the best ways to remove splinter safely. Let’s dive into the world of splinter care and explore practical techniques for healthy recovery.
Understanding Splinters: Identification and Risks
Before diving into splinter removal techniques, it’s important to understand what a splinter actually is. A splinter, often referred to as a wood sliver, occurs when a sharp piece of wood penetrates the skin. Recognizing the symptoms of a splinter issue can help in determining the most effective methods for removing splinters early, before any complications arise. Look for redness, swelling, or pain in the affected area, as these can indicate a splinter embedded in your skin.
How to Identify a Splinter
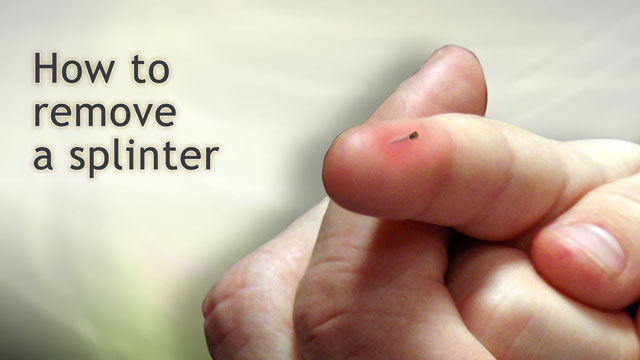
Identifying a splinter can be easier than you think. Start by visually inspecting the area; sometimes, the wood particle can be seen protruding slightly from the skin. If it’s hard to spot, look out for symptoms like localized pain, tenderness around the area, and even a small bump. Knowing how deep can a splinter go is also critical, as deeper splinters require caution and may need professional care.
Common Types of Splinters and Their Risks
Understanding the common splinter types can assist in quick identification and treatment. Wooden splinters from furniture, barbed wire, or wooden products are common. However, you might also encounter glass or metal splinters. Each type presents unique risks; for instance, glass can introduce infection risks that may lead to serious complications if not addressed promptly. This highlights the need for splinter extraction at home using safe splinter removal techniques.
Prevention Techniques for Avoiding Splinters
Preventing splinters, especially for those who work with wood, involves understanding and utilizing proper safety measures. Ensure you’re using protective wear like gloves when performing activities that involve rough wood surfaces. Regularly inspect and maintain your tools, as splinters often come from poorly handled or faulty equipment. Educating yourself on how to avoid splinters not only protects your skin but also enhances your woodworking skills.
Safe and Effective Splinter Removal Techniques
When you’re dealing with a splinter, it’s important to know the best ways to remove splinter safely to minimize pain and prevent further damage. Various splinter extraction methods may work effectively, such as using tweezers or other home remedies for splinters.
Using Tweezers for Splinter Removal
One of the most common techniques for extracting a splinter is using tweezers. It’s vital to ensure that the tweezers are sterilized before use to prevent infection. Grip the splinter firmly and pull it out in the same direction it went in. If the splinter is difficult to grasp, you may want to use a magnifying glass to help you see better. This straightforward approach effectively minimizes discomfort during the splinter first aid process.
Needle and Pliers Splinter Removal
In some cases, a needle may be necessary as a preliminary step to expose the splinter. Sterilize a needle, then gently poke the skin around the splinter to create a small opening. Once it’s exposed, use tweezers to pull it out. Combining needle and pliers splinter removal gives you better access, especially for deeper splinters lodged under the skin. Always take care during this process to avoid causing further injury.
Home Remedies for Splinters: Baking Soda and Vinegar
These natural ways to remove splinter can be surprisingly effective. For example, a paste made using baking soda and water can help draw a splinter out. Apply this paste to the affected area and cover it with a bandage; leave it on for a few hours. Similarly, soaking the area in vinegar may also loosen the splinter, making it easier to extract. Always ensure you perform splinter removal with vinegar in a clean environment to avoid any chances of infection.
Post-Extraction Care: Healing and Prevention
Proper care following splinter removal is crucial for effective healing and to prevent splinter infections. Here are some splinter care tips that can aid in recovery after you’ve successfully extracted the splinter.
How to Treat a Splinter Wound
After removing a splinter, thoroughly clean the area with soap and water, followed by an antiseptic application to prevent any potential infection. Applying a sterile bandage is recommended, especially if it’s on a hand or foot that’s likely to be disturbed. This basic splinter aftercare will help in the wound healing process significantly.
Managing Pain After Splinter Removal
Pain management is also important after splinter removal. Non-steroidal anti-inflammatory drugs (NSAIDs) can help alleviate pain and inflammation. If you’re looking for pain relief for splinters, consider using topical treatments or natural remedies to soothe the area. Remember to follow up with regular cleaning and change of the dressing to ensure the area remains clean.
Recognizing Signs of Infection
If symptoms worsen post-extraction, it’s essential to be vigilant for signs of infection, such as increased redness, swelling, warmth, and discharge. Knowing when to see a doctor for a splinter is crucial; persistent symptoms warrant professional assistance.
FAQ
1. What are some natural ways to remove splinters without tools?
A few home remedies include using baking soda paste or a vinegar soak. These methods can help draw the splinter to the surface, making manual removal more manageable.
2. How deep can a splinter go before I need to seek medical attention?
If a splinter is deeply embedded, or if it has been there for several days and is causing significant pain or signs of infection, it’s time to consult a healthcare professional.
3. Can I use tape to remove a splinter?
Yes, using tape can sometimes dislodge a splinter. Apply a piece of sticky tape over the area, then pull it off quickly to see if it can yank the splinter out without further irritation.
4. What are splinter risks for pets, and how should I address them?
Pets can be at risk for splinters, particularly if they play with wooden toys. If your pet gets a splinter, it’s essential to assess the situation carefully and seek veterinary care if needed.
5. How can I prevent splinters while woodworking?
Wearing protective gloves, using smooth wood, and regularly sanding down work surfaces can significantly reduce the risk of splinters for woodworkers. Always use caution when handling wood materials.
6. Can splinters cause serious infections if left untreated?
Yes, untreated splinters can lead to serious infections, especially if they are deeply embedded. Signs of infection should be monitored closely, especially for severe cases requiring medical attention.
7. What is a professional approach to splinter management?
Consulting a healthcare professional can ensure proper cleaning, removal, and follow-up care to prevent complications, especially for stubborn or infected splinters.
Conclusion: Safe Splinter Removal for a Healthy Recovery
In summary, understanding how to remove splinter effectively is essential for maintaining skin health and managing pain. Following the best ways to remove splinter and appropriate aftercare can significantly affect recovery time and health outcomes. Keep this guide handy for when those pesky splinters try to interrupt your day, and remember: proper knowledge equips you for safe and effective splinter management!
“`